

How To Create A Java File In Linux Terminal
Java in the Terminal
Learning How to Run Java using Only the Command Line
![]()

I don't know if it's how I was taught Java but my go-to method of running it is through the terminal. I enjoy the "hacker vibe" you get from being able to just use the keys on your keyboard to control the execution of a program.
In this article, I will be sharing how you can run your Java programs inside the command line.
Requirements:
- Java — This must be installed and should be set as an environment variable.
Note: This demonstration will be done on a windows machine.
Running Your Programs In The Terminal
Running your Java programs from the command line gives an appreciation to the entire compilation and execution process that happens when executing your Java programs.
Let's Begin!
We'll start off by running a single Java file but first, let's create that file. To create a single Java file, all that is needed is the name of the file plus the .java extension as shown below with DemoTerminal.java .
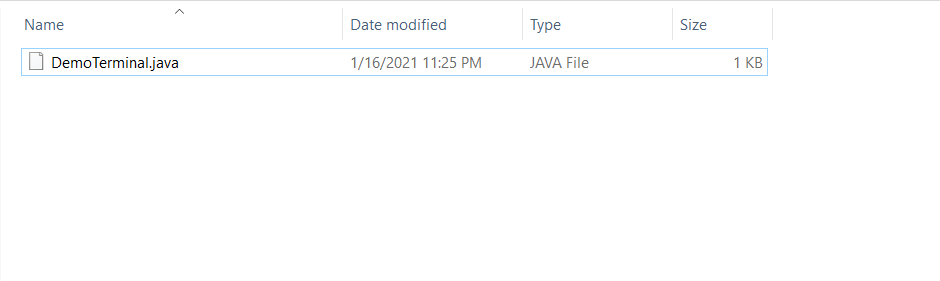
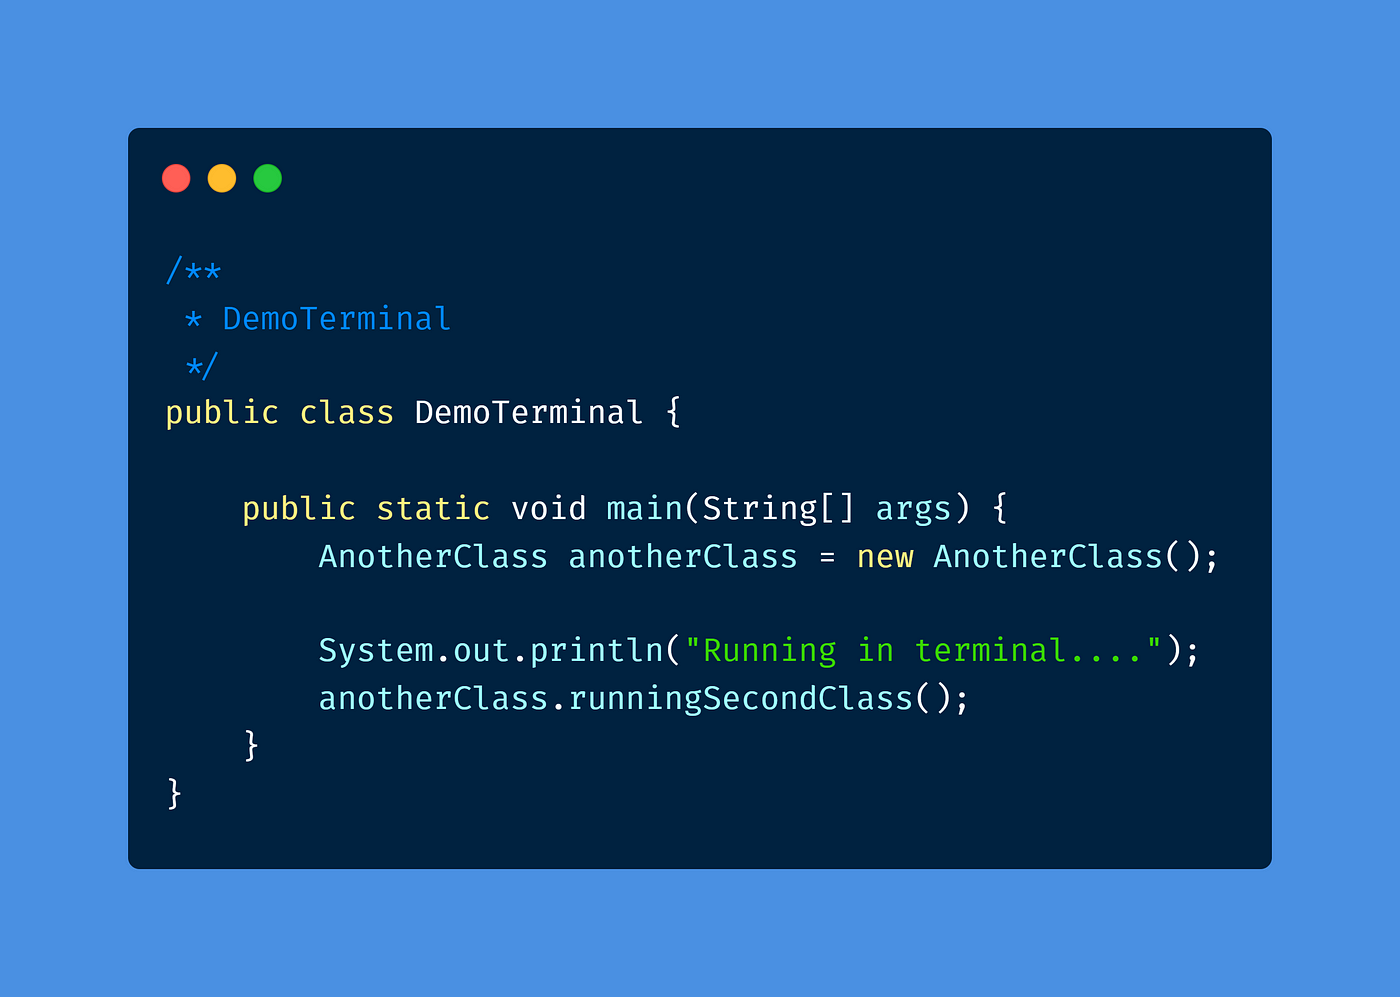
There you have it, we've just created a DemoTerminal.java file
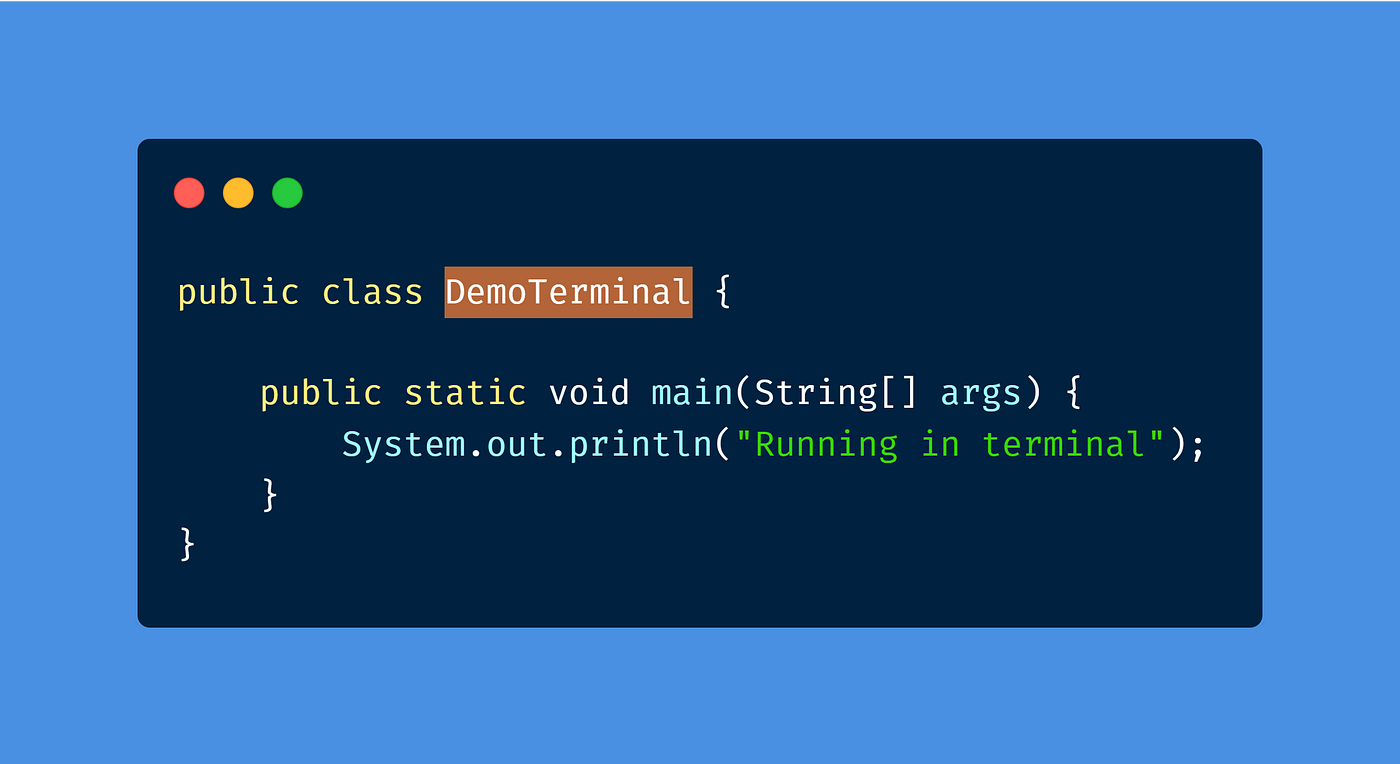
Our DemoTerminal.java consists of the code snippet above. If it runs successfully, the program will execute Running in terminal .
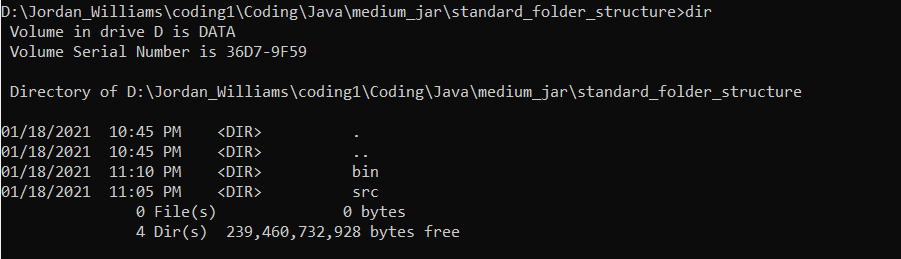
Let's now open the location of DemoTerminal.java in our terminal.
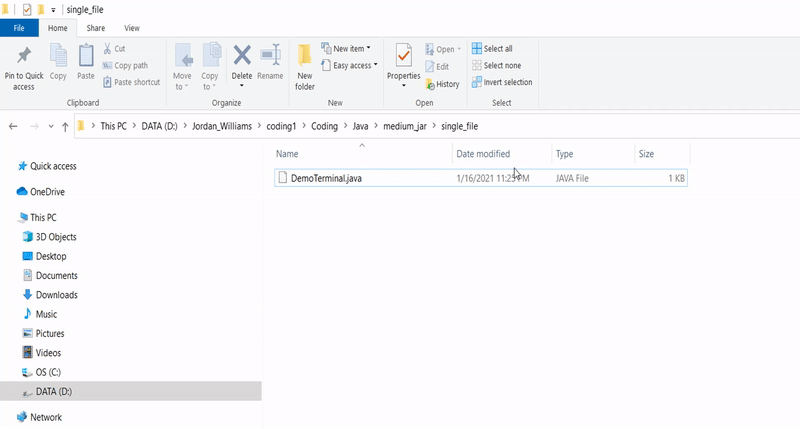
By typing cmd in the address bar, you can open the command line in the directory that you are currently in.
By typing dir, you can confirm the files that are in the current directory.
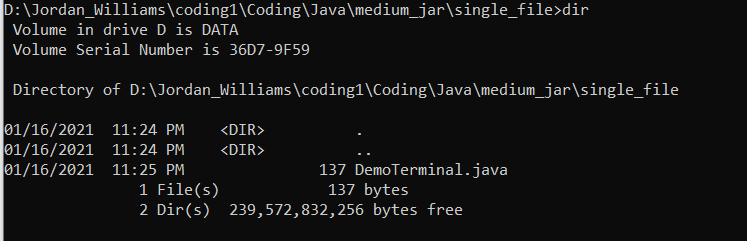
As you can see from the screenshot above, the DemoTerminal.java is in the current directory.
Note: This is just good practice to see and confirm the files are in the directory.
Executing a Java program requires two (2) steps. Compilation and execution.
Let's compile our code inside the terminal using the snippet below.
javac DemoTerminal.java This is how we compile our code. Think about javac as java + compile (c). It takes the source code( DemoTerminal.java in this case) and converts them into .class files. These .class files are an intermediary standard called bytecode that is understood by Java.
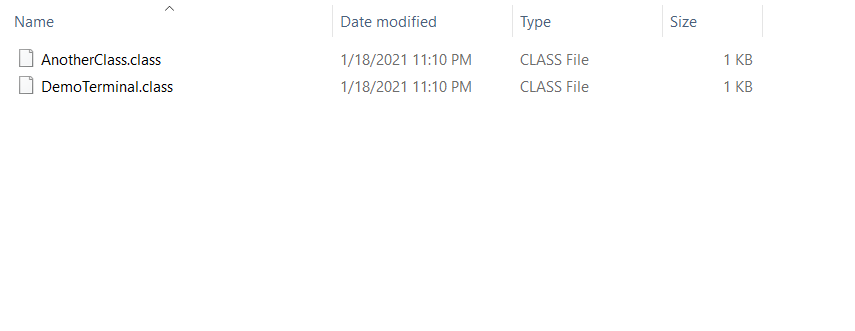
If you type another dir command or look into your file explorer you will notice the presence of our class file after compilation.
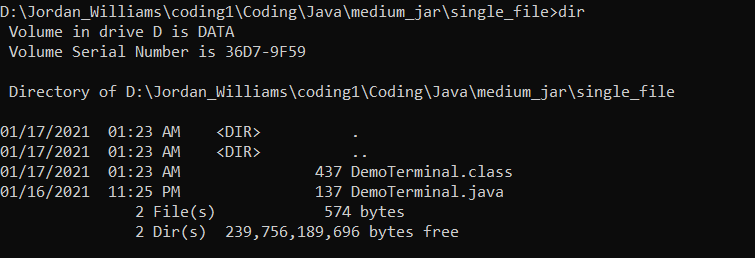

As you can see, the DemoTerminal.class file was generated from our javac command.
All we need to do now is to run DemoTerminal class file.
java DemoTerminal We use the java command to run our code. You will notice that we did not need to put the .class extension field in our file. This is because it is not necessary. The java command takes the actual class that you want to run (public class DemoTerminal ).
Output:
Running in terminal 
Our code is now running in the terminal.
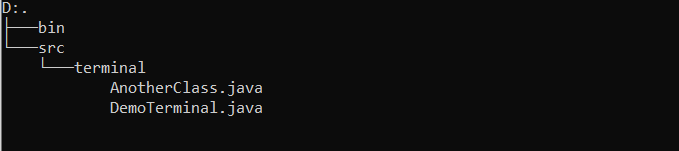
Running Java Files From A Standard Directory Structure
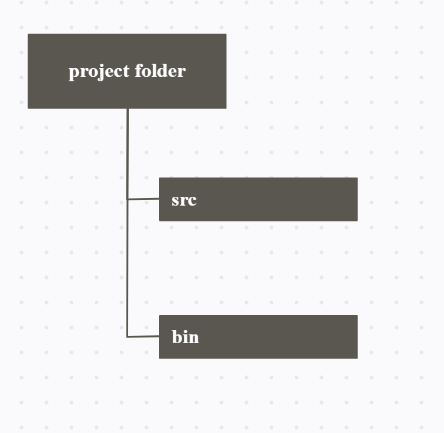
This is the folder structure that we are working towards:
- src — Holds all our source code.
- bin — Holds all our class files generated from compilation (
javac).
This structure provides for a much more organized approach to have our class files in one folder and our source code in another.
Let's look at an example.
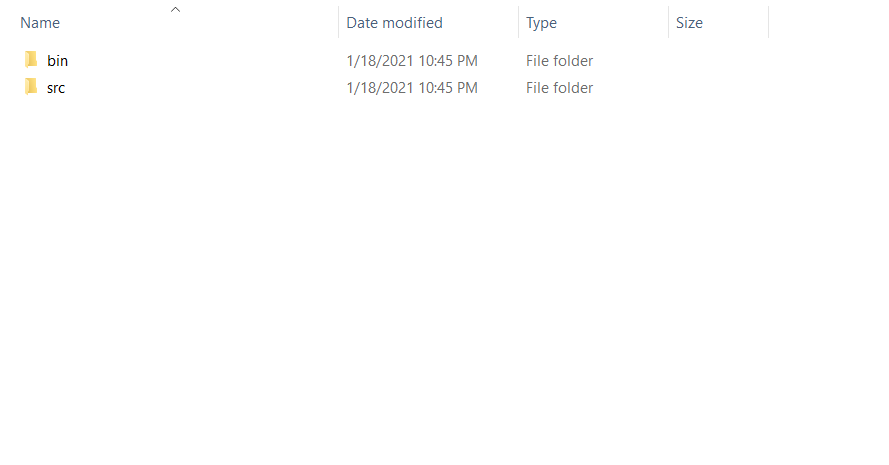
Let us create both a src and bin folder inside our project folder.
Inside the src folder we'll be creating 2 .java files.
-
DemoTerminal.java -
AnotherClass.java
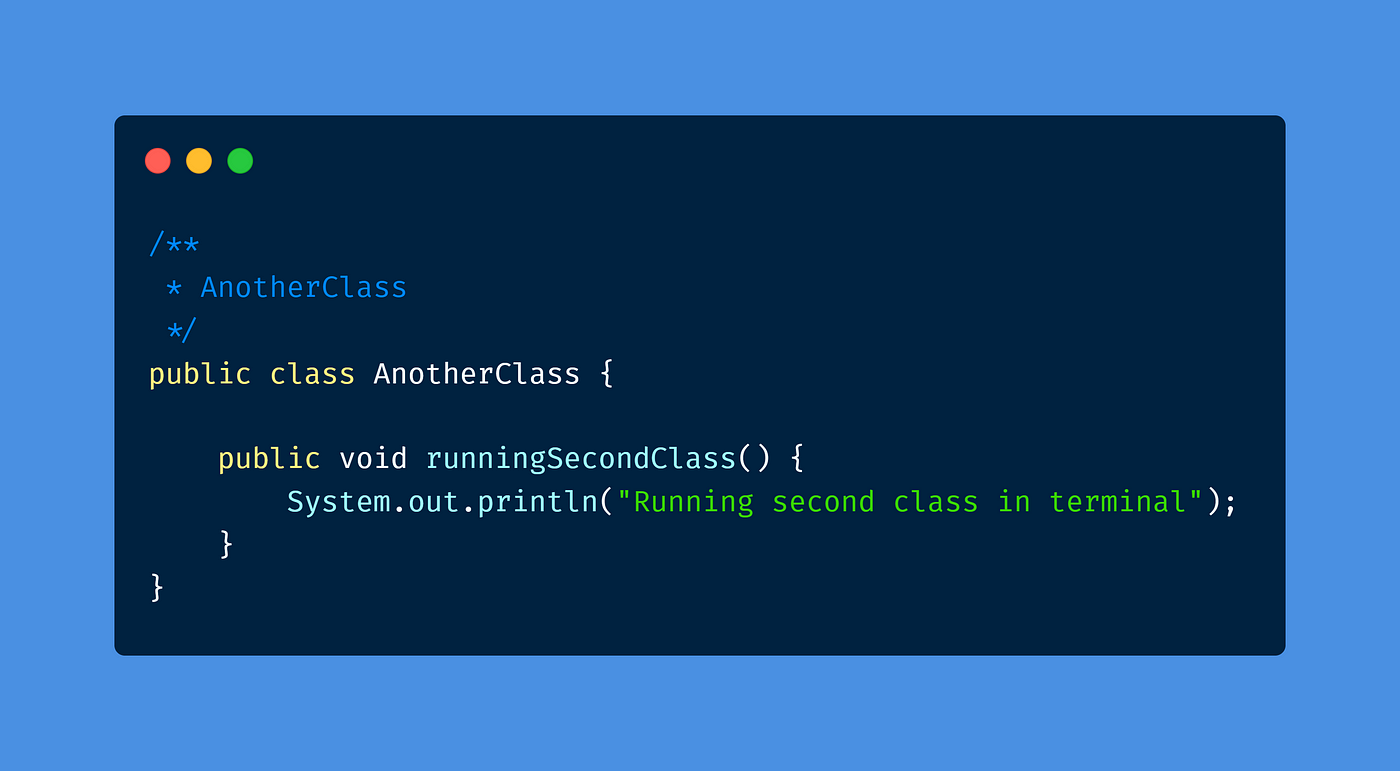
The DemoTerminal.java code is below:
The AnotherClass.java code follows:
Now, let's try running these files.
Navigate in your terminal to the root of the project — this is where you can see both src and bin folders.
Our plan here is to compile all the code within the src folder to the bin folder.
We'll use the following command:
javac -d bin src/*.java The command above is similar to the command that we ran previously. However, the presence of the -d specifies the directory in which you want the compiled .class files to go into. In this case, we specified the bin folder where we have the source code( .java ) files that we will be using in the compilation with src/*.java .
Note: src/*.java . This is the location to our source code. The * in *.java is a wild card. It means "all files". However, by adding the .java extension, it means all .java files within the folder. Hence src/*.java will look for all Java files in the src folder.
After running this command we can now check our bin folder.
You will notice that this is where all our class files are now added. Again, this allows for better structure with our source code is in one directory and our class files being another.
Our next step, as you should already know — is to run our compiled code. Similar to our last execution, we will be using the java command.
java -cp bin DemoTerminal Notice that this time around we used the -cp flag. This is short for classpath. Java's classpath specifies the location of the user-defined classes (.class files) and packages. In using -cp which is the classpath, we can specify where our .class files are which were built to execute our program. Our .class files are located in the bin folder.
We use DemoTerminal because this is where our main(public static void main) is located.
Output:
          Running in terminal....
Running second class in terminal
Our code is now running!
Using Packages
Most times you will use packages in your Java code. To allow for the use of packages we will make a slight modification to how we run our code.
Let's place the previously created src code into a package but, also let us delete the previously generated .class files in the bin folder so we can start from "fresh".

This is how our project folder for our code currently looks. Recall, we had removed what was in the bin folder.
Now, we are going to add both AnotherClass.java and DemoTerminal.java to a package called terminal .
We are not quite done yet. We now need to add the definitions for our package in our respective files.
package terminal; The code snippet above should be at the top of both your .java files.
Now, let's run our code.
Go to the root of our project — this is where you can see both thesrc and thebin folders. Run the command below:
javac -d bin src\terminal\*.java Very similar to the one we ran before. However, we are now compiling all the files within the terminal folder.
Now, let's run our code again.
java -cp bin terminal.DemoTerminal The only difference found from our previous command to the one above, is that we now have to append the package. So its <Package>.<Main Class> .
Output:
          Running in terminal....
Running second class in terminal
Note. It is possible to have packages within packages. So you would have to add all the packages leading up to the file you want. Hence <Package 1>.<Package 2>.<Package X>.<Main Class> .
Final code below:
Conclusion
There You Have It !
You just learned how to run your own Java programs from the terminal using a windows operating system. Running your programs from the terminal will only increase your confidence level and knowledge of navigating the command line. Always remember to make use of your packages because they are very useful in the organization and coherence of your program.
How To Create A Java File In Linux Terminal
Source: https://levelup.gitconnected.com/java-in-the-terminal-8888310a16ae
Posted by: healeywimen1958.blogspot.com
0 Response to "How To Create A Java File In Linux Terminal"
Post a Comment